If you're a mushroom cultivator ready to level up your growing game, then it's time to consider liquid culture.
Liquid culture offers faster colonization and more predictable outcomes than spore inoculation, and an easier process than agar work.
And if you've been buying grain spawn from a supplier, liquid culture will open up the doors to creating your own grain spawn at a fraction of the price.
In this article, we're going to delve into everything you need to know about liquid culture, including a step-by-step guide on how to whip up your own liquid culture right at home.
Short summary
-
Liquid culture is a nutrient-rich solution that promotes the growth of mushroom mycelium. It allows for the inoculation of grain, which is a crucial step in cultivating mushrooms.
-
Liquid culture allows for a sterile process without the need for lab-grade equipment or skills in agar work, making it a more accessible option for many mushroom growers.
-
Creating your own liquid culture involves a careful balance of ingredients, sterilization, and storage conditions.
What is liquid culture?
Basically, mushroom liquid culture, or liquid culture broth as it's sometimes called, is a mix of mushroom mycelium (the vegetative part of a fungus) and a nutrient-rich liquid.
The nutrient-rich liquid, which is sterilized, provides the perfect environment for the mycelium to grow.

Liquid culture is then used to inoculate grain, creating grain spawn.
Think of grain spawn as the equivalent of seeds in a garden.
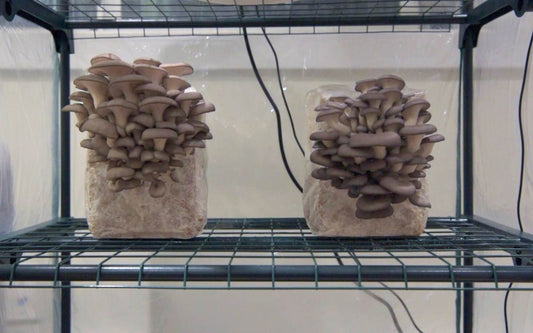
Just as you plant seeds in soil to grow plants, you use grain spawn to inoculate a substrate, like hardwood or straw, to grow mushrooms.
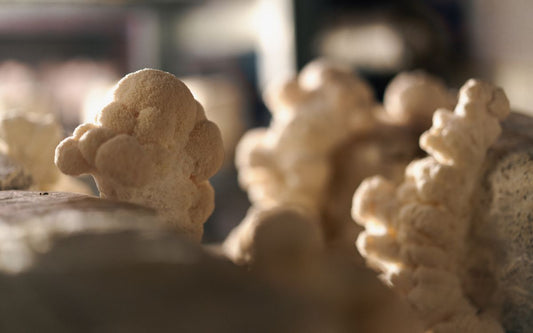
Learn how to create liquid culture and grain spawn, and you'll be able to cultivate all types of mushrooms, including oyster and lion's mane mushrooms, and so much more.
Benefits of liquid culture
Mushroom liquid cultures greatly simplify home mushroom cultivation.
They allow for grain inoculation on everyday surfaces like a kitchen counter, eliminating the need for specialized equipment such as a still air box or laminar flow hood.
This reduces both the cost and complexity for beginners.

Also, these cultures are less prone to contamination, decreasing the likelihood of failure and encouraging continued experimentation.
Other advantages include rapid colonization rates, ease of preparation and expansion, and low production costs, with basic ingredients like water and honey readily available and affordable.
Creating your own liquid culture
Creating your own liquid culture recipe is a fun and integral aspect of mushroom cultivation.
By understanding common ingredients and ratios, you can create the perfect nutrient solution to promote healthy and robust mycelium growth.
Key ingredient: sugar
Sugar is the key ingredient in liquid culture, providing essential nutrients for the growth and development of mushroom mycelium.

The most commonly used types of sugar in liquid culture include:
Light malt extract: Favoured for its nutrient profile and clarity after sterilization, making it easier to observe mycelium growth and detect contamination.
Dextrose (glucose): A simple sugar that's easily metabolized by the mycelium, promoting quick and healthy growth.
Honey: A natural sugar source that's often used due to its availability, though it may not provide as clear a solution as light malt extract.
Ratios and proportions
Precise measurement of ingredients in your liquid culture recipe is important.
To achieve the optimal sugar-to-water ratio, add 1 gram of light malt extract for every 600 milliliters of water. For other sugars, such as honey, use 24 grams per 600 milliliters of water, which is equivalent to 4 percent.

Different sugars may have varying effects on mycelium growth, so experimenting with different sugar types can help you find the optimal balance for your specific mushroom species.
Full equipment list
The list below compiles all the items you'll need to prepare, sterilize, and inoculate your liquid mushroom culture.
Necessary
-
Sugar (light malt extract, dextrose, honey)
-
Distilled water
-
Canning jar
-
Airport lid (a modified canning lid with a self-healing injection port and filter)
-
Aluminum foil
-
70% isopropyl alcohol
Optional
-
Magnetic stir bar and stirrer (you can manually swirl instead)
-
Coffee filter and elastic band (the liquid culture recipe will still work without filtering)
Step-by-step guide to making liquid culture
With a sound understanding of liquid culture and its advantages, it’s now time to master the process of making your own.
In this step-by-step guide, we will walk you through the process of making liquid culture.
1. Preparing the liquid culture solution
Firstly, measure out one gram of your sugar. This will serve as the food source for your mushroom mycelium.
With your sugar measured, add it to a mixing container, followed by 600 ml of distilled water.
Stir the mixture thoroughly until the sugar is completely dissolved.

Place a magnetic stir bar into a one-litre canning jar. This jar will serve as your liquid culture's vessel.
The stir bar is crucial as it will allow us to mix the culture while keeping the jar sealed, preventing contamination.
If you don't have a magnetic stir bar and stirrer, insert a glass marble or other small object. This will allow you to mix and break up the culture manually.
2. Filtering and sealing
Place a coffee filter over the top of the jar, secured by an elastic band. This will allow us to filter out any sediment.
Ensure the filter is deep enough to allow a smooth pouring of the mixture.
Then, pour the mixture through the filter.

Next, cap the jar with an airport lid.
An airport lid is a specialized lid featuring a self-healing injection port (for injection and withdrawal of culture) and an air-exchange filter. You can purchase these online or make your own.

Cover the lid with aluminum foil to protect the filter and injection port during sterilization.
4. Sterilization
Place your jar (or jars) in a pressure cooker, adding water as per the manufacturer's instructions.

Sterilize at 15 PSI for 20 minutes. This step is critical to ensure the solution is sterile.
Remember, follow your specific pressure cooker's guidelines.
5. Inoculation preparation
After the jars have cooled for at least 12 hours, prepare to add your liquid culture.
Work in a clean area. If you don't have a flow hood or still air box, that's okay. Liquid culture syringes are great because they can be effectively used anywhere, as long as you follow sterile technique.
Clean the workspace with 70% isopropyl alcohol.
Sanitize your gloved hands with alcohol, and then clean the jar.

Shake the syringe to distribute the culture evenly, a crucial step if you're not using the entire syringe at once.
Clean the syringe and needle packaging thoroughly.
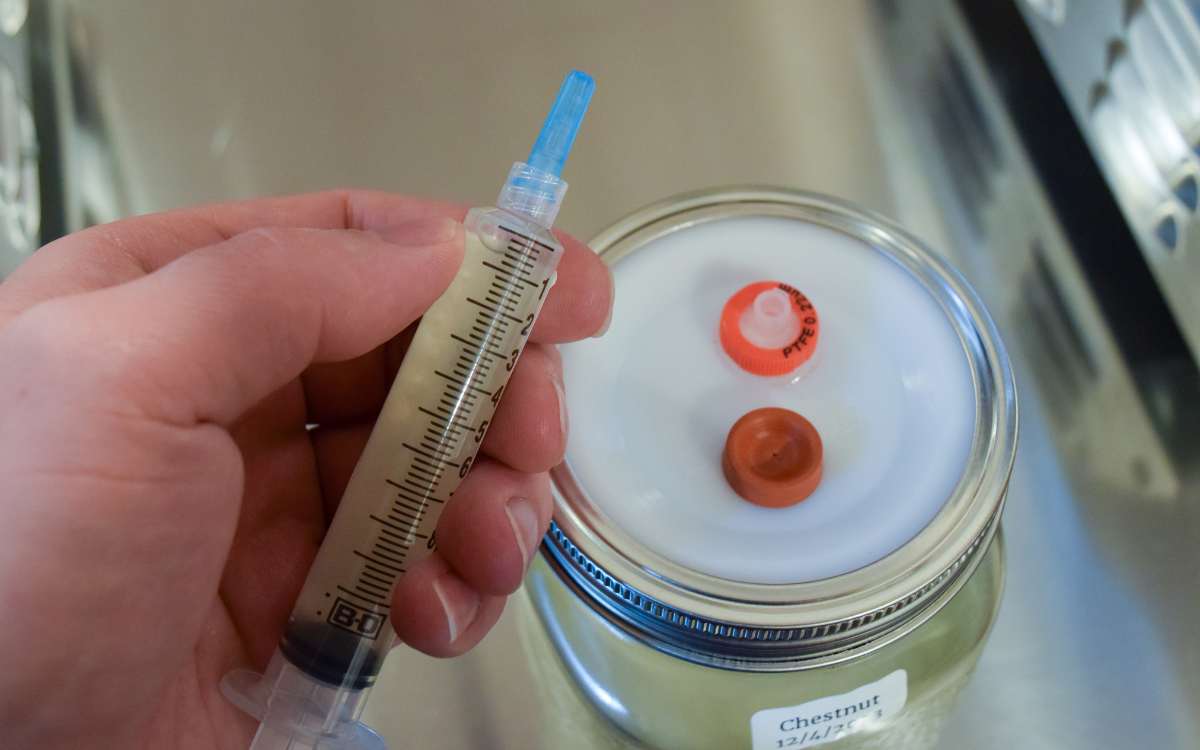
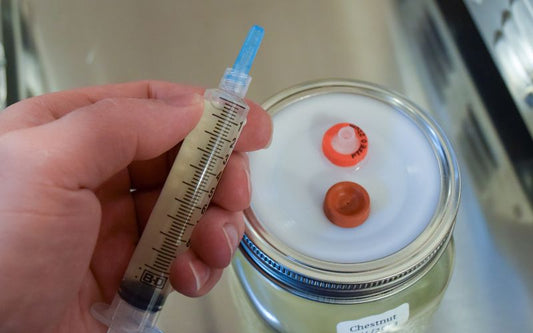
6. Inoculation
Attach the needle to the syringe while holding it in the package.
Remove the needle cap and wipe the needle with alcohol.
Sterilize the needle with a butane torch or lighter, letting it cool down afterward for a moment or two.

Insert the needle into the injection port and deposit some or all of the culture into the jar. Cap the needle for safety.
7. Agitation
Finally, use a magnetic stirrer to agitate (or mix) the culture. This action disperses nutrients, aerates the culture, and prevents mycelium from clumping together, fostering healthy growth.

Agitate daily for optimal results.
If you don't have a magnetic stir bar stirrer, gently shake or swirl the jar to the best of your ability.
8. Incubation
Consistent temperature and darkness are crucial for successful mycelium growth in liquid culture.
Here are some key points to remember:
-
The optimal temperature range for incubating liquid culture is around 21-26 degrees Celsius (70-80 degrees Fahrenheit), depending on the species.
-
Maintaining darkness during the incubation process is critical for the growth and development of mycelia.
Identifying healthy vs. contaminated liquid culture
As you get more experienced with liquid culture, it's crucial to recognize the signs of a thriving culture versus possible contamination.
Pay close attention to your liquid culture and watch out for any odd changes.
This vigilance will help you achieve successful and contamination-free mushroom growing.
Healthy liquid culture
The liquid culture solution should be clear, with blobs of mycelium growing and floating.

As the liquid culture matures and the mycelium continues to grow, the solution may become slightly cloudy, which is normal and expected.
Signs of contamination
If your liquid culture becomes very cloudy, changes colour, or starts to smell bad, these could be signs of bacterial or mold contamination.
Using liquid culture for mushroom cultivation
Now that you understand liquid culture and the processes of creating, maintaining, and monitoring it, it’s now time to use your liquid culture.

In this section, we’ll discuss how to prepare and inoculate grain with liquid culture, creating grain spawn.
Preparing grain
Before inoculating grain with liquid culture, it’s important to ensure the grain is sterilized and has the proper moisture content.
Using a pressure cooker or autoclave, sterilize the grain at 15 PSI for 150 minutes. This process will eliminate potential contaminants and create a safe environment for mycelium growth.
Inoculating grain spawn
To inoculate grain spawn with liquid culture, follow these steps:
- Use a sterile syringe to withdraw liquid culture from your jar
- Inject approximately 1-2 ml of liquid culture into a quart-sized jar of grain.
- Use 5-10 ml of liquid culture to inoculate a 5 lb bag of sterilized grain.
- A jar or bag of grain should be fully colonized in 14-45 days, depending on the mushroom species and environmental conditions.
Storage and shelf life of liquid culture
Appropriate storage of liquid culture is pivotal for preserving its viability and keeping it free from contamination.

In this section, we’ll discuss the ideal storage conditions and shelf life expectancy of liquid culture, providing you with valuable insight on how to preserve your liquid culture for future use.
Proper storage conditions
The best way to store liquid culture is in a cool, dark place, such as a refrigerator or basement.
It’s important to avoid freezing the liquid culture, as this can damage the mycelium and render it unusable.
Shelf life expectancy
Liquid culture can last for 6-12 months in the refrigerator, but it is best to use it within a month or two for optimal viability.
Factors such as mushroom species, medium composition, and storage conditions can all influence the shelf life of liquid culture.
To ensure the best possible results, it’s recommended to use liquid culture within a few weeks of preparation, following one of the several liquid culture recipes available.
Conclusion
In this comprehensive guide, we’ve covered the essentials of liquid culture, its benefits, and the process of creating and maintaining a successful liquid culture for mushroom cultivation.
By understanding the importance of proper ratios, sterilization, and storage, you can unlock the full potential of liquid culture for your mushroom cultivation projects.
So why wait? Start experimenting with liquid culture today and elevate your mushroom growing experience to new heights!
Frequently asked questions
What is liquid culture?
Liquid culture is a nutrient-rich solution used to grow mushroom mycelium.
It's a mix of mushroom mycelium and a sterilized liquid, often used to inoculate grain to create grain spawn, which is essential for mushroom growing.
What are the key benefits of liquid culture?
Liquid culture simplifies mushroom cultivation at home. It allows for inoculating grain without specialized equipment, reduces costs, and is less prone to contamination. Other advantages include fast colonization, ease of preparation, and affordability.
How do I make liquid culture from scratch?
To make liquid culture, mix a sugar source (like light malt extract or honey) with water, sterilize the solution, and then introduce mushroom mycelium. Use a canning jar with an airport lid for the culture and a pressure cooker for sterilization.
What equipment is needed to create liquid culture?
You will need sugar (like light malt extract, dextrose, or honey), water, a canning jar, an airport lid, aluminum foil, a pressure cooker, a liquid culture syringe, isopropyl alcohol, and optionally a magnetic stir bar and stirrer.
What is the step-by-step guide to making liquid culture?
Start by dissolving sugar in water, then sterilize the solution in a pressure cooker. After cooling, inoculate with mushroom mycelium using sterile technique. Agitate the mixture regularly and incubate at a consistent temperature in the dark.
How can I tell if my liquid culture is healthy or contaminated?
Healthy liquid culture will be clear with visible mycelium growth. Signs of contamination include cloudiness, color changes, or foul odors.
What's the best way to store liquid culture and what's its shelf life?
Store liquid culture in a cool, dark place like a refrigerator or a basement, but avoid freezing. It can last 6-12 months, but for optimal viability, use it within a few weeks of preparation.

Spenser Smith
I am passionate about mushrooms. My number one goal: help you grow mushrooms in your home!
2 comments
Hi Jan. Yes, exactly. You can use your existing liquid culture to create new cultures.
Thanks for the helpful information! Since the liquid cultures have a limited shelf life, what would the process look like to keep from running out? Can I create a second batch from the first batch once it's colonized?