There are a few reasons why growing lion's mane mushrooms in a bucket is one of my favourite methods:
- You don’t need any prior skills or experience.
- You don’t need any expensive or specialized equipment.
- You don’t need to sterilize or pasteurize your substrate.
And the best part? It’s easy to get amazing results right at home.
Let’s jump in.
Materials
- Lion's mane grain spawn
- 8 litre (2 gallon) bucket
- Drill with 1/4” drill bit or hole saw
- Hardwood fuel pellets
- Micropore tape
- Mixing container
Step 1: Drill holes in bucket
You’ll need to drill holes in your bucket from which lion’s mane mushrooms will eventually grow.
There are two options:
1. Use a hole saw attachment on your drill to cut two holes (1 to 2 inches) on opposite sides of the bucket.

2. Use a 1/4” drill bit to cut a series of holes.

With either option, cut the holes near the top of the bucket so that the mushrooms have room to grow.
With larger holes, you can expect larger fruiting bodies.
With smaller holes, you can expect a series of smaller fruiting bodies.
I prefer to cut two larger holes, but there are some advantages to cutting smaller ones.
For one, you don’t need a hole saw.
Also, with smaller holes, you don’t need micropore tape, which takes us to our next step.
Step 2: Add micropore tape to bucket
If you cut two large holes, cover both with micropore tape.
This breathable tape will help keep your substrate hydrated while also allowing the mushroom mycelium to breathe and stay healthy

It also helps to keep contaminants out.
If you cut a series of smaller holes, micropore tape is not totally necessary but can be added if desired.
Step 3: Prepare hardwood substrate
In nature, lion’s mane loves to grow on hardwood, so we will be using hardwood fuel pellets as our substrate.
Not only are fuel pellets cheap to buy, but they are already pasteurized (the process in which sawdust is turned into pellets involves high heat, which kills off a good chunk of contaminants).

To prepare the substrate, add 1,440 grams of hardwood fuel pellets into a clean mixing container.
Then add 2.2 litres of cold water.
This equals a hydration rate of 60 percent.
Close the lid on the mixing container and let the water soak into the pellets for 15 minutes.
After the 15 minutes is done, mix the pellets thoroughly to evenly distribute the water.
Then put the lid back on, and let the wood sit for another 15 minutes.
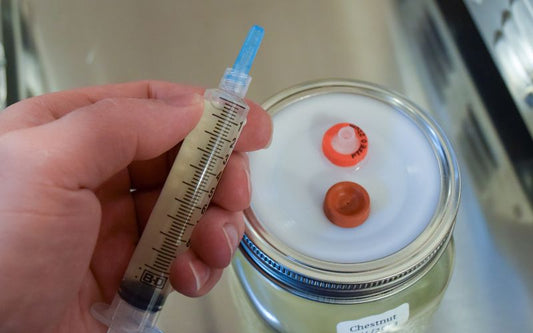
Step 4: Add grain spawn to substrate
After 15 minutes have passed, add 750 to 1,500 grams of lion’s mane grain spawn to the container.
1,500 grams of spawn equals a spawn rate of approximately 40 percent (the weight of the grain spawn equals 40 percent of the combined weight of the water and pellets).

This is a very high spawn rate which will help the substrate colonize quickly. It will also increase the yield and reduce contamination risk.
Feel free to reduce the spawn rate down to 20 percent, which equals 750 grams. You’ll still get good results at this spawn rate, but it will just take a bit longer for your substrate to colonize.
Once you’ve added your grain spawn to the container, mix thoroughly, making sure the grain is evenly distributed throughout the wood.
Step 5: Fill bucket with substate/spawn mixture
Now it’s time for the fun part: filling the bucket!
I like to use a scoop but feel free to use your hands instead

If using a scoop, make sure it’s clean. If using your hands, wash them beforehand or wear gloves.
As you go, press down on the mixture to remove any air pockets.
Make sure to fill the bucket to the top.
Step 6: Colonization
Colonization is the process in which mycelium (the root-like structure of mushrooms) grows and takes over a substrate.
In this case, the mycelium from the grain spawn will take over the hydrated wood.
Once this process is complete, mushrooms will be ready to fruit.

Mycelium grows best in darkness, so place your bucket in a dark space (I like to place mine in a closet without windows).
The speed of colonization depends on a few factors, including spawn rate and temperature.
With this recipe, we’re using a high spawn rate, which means colonization should only take a week or two at room temperature.
Step 7: Remove tape
After a couple of weeks, remove a piece of tape or two from both holes.
If the substrate is covered in white mycelium, it’s ready to fruit and you can remove the rest of the tape.

If it’s not covered in white mycelium, re-apply the tape and allow more time for colonization.
Also, if you allow your bucket to colonize for too long, mushrooms may begin growing from behind the tape and, in some cases, burst right through.
To avoid this happening, check on your bucket regularly while it’s colonizing.
Although, if it does happen, it’s not a huge deal. Simply remove the tape (if the tape is stuck on a mushroom, remove it carefully) and grow your bucket as normal.
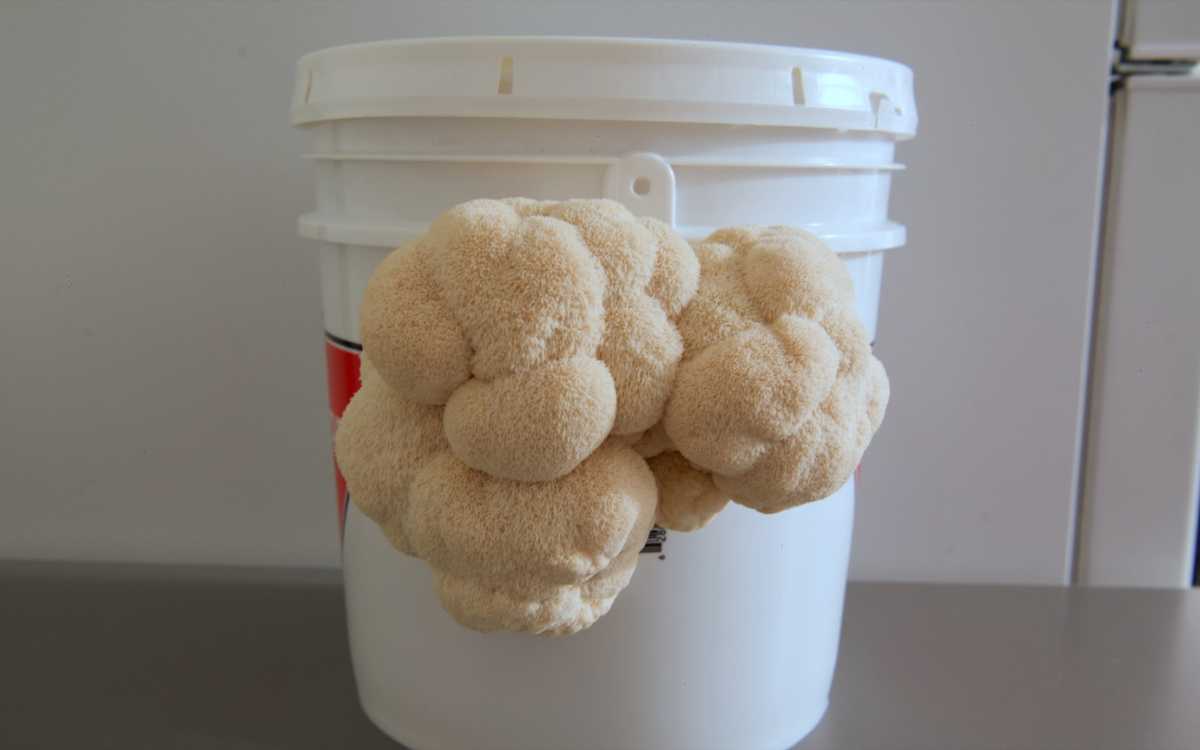
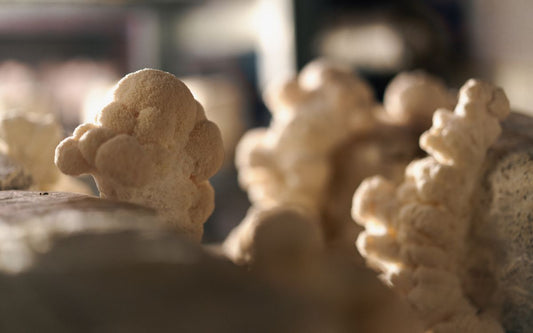
Step 8: Fruit mushrooms
It’s time to fruit your lion’s mane mushrooms!
You can grow indoors or outdoors.
If growing indoors, find a place to put your bucket that receives indirect sunlight and stays between 16C to 24C (60F to 75C).
While fungi don’t rely on sunlight for energy like plants do, indirect sunlight signals to the mycelium that it’s time to grow (direct sunlight will stunt the growth of your mushrooms).
Next, place your bucket on a plate or tray.

You’ll need to spritz your bucket several times a day with water, which the plate or tray will help catch.
The reason you need to spritz the bucket every day is because mushrooms need an environment with high humidity to grow.
Spritz the two holes directly while also spritzing around the bucket.
To increase the humidity further, you can make a humidity tent to cover your bucket with.
A humidity tent is just a clear bag with a series of holes in it (make sure the bag is clear to allow for sunlight, and make sure it has 1/2 inch holes to allow for air exchange).

If you make a humidity tent, instead of spritzing the bucket directly, spritz the inside walls of the humidity tent instead.
Of course, if you have a fruiting chamber of some kind (like a shotgun fruiting chamber or a Martha grow tent), you can use it instead.
You can also grow your bucket outdoors, and the instructions are essentially the same.
Find a place to put your bucket that receives indirect sunlight, make sure the temperature is in the right range, and maintain humidity by spritzing every day.
If the weather is rainy and the humidity is naturally high, you can skip the spritzing part altogether!
Step 9: Harvest mushrooms
After a week or two, your mushrooms should be fully formed and ready to harvest.
It’s a good idea to harvest once the spines are a few millimetres long.

Also, if the mushroom begins to yellow or become discoloured, you’ll want to harvest right away.
To harvest, twist the mushroom gently to remove it from the bucket.
Step 10: Second harvest
You can typically get multiple harvests from your bucket.
After the first harvest, I like to spray both holes to make sure the substrate is nice and hydrated again.
Then, put your bucket back into fruiting conditions and you should see new mushrooms forming soon.
Conclusion
Growing lion’s mane mushrooms in a bucket is an easy and cost-effective method.
With just a few simple steps, you can get amazing results right at home.

So, why not give it a try and experience the fun of growing your own lion’s mane at home?
If you have any questions, let me know in the comments below, and I’ll get back to you soon!

Spenser Smith
I am passionate about mushrooms. My number one goal: help you grow mushrooms in your home!
30 comments
Hi Silo. Generally, it will produce mushrooms for a couple of months.
Hi Kevin. Yes, Pit Boss hardwood pellets are fine! I’ve used that brand before.
I have pit boss bbq hardwoods pellets, they should work fine as well correct?
One more question, how long will a pail produce? is this a one year thing or will the pail last more than a season?
Thank you.
Hi David. Thanks for reading and watching! Yes, if you compress the grain spawn and hardwood mixture too hard, you could create an anaerobic environment. While it’s a bit hard to see in the video because I sped up the bucket-packing part, I pack the mixture quite lightly.